Wednesday, June 9, 2010

Raspberry & Rhubarb Vanilla Rice Pudding


The pudding of my childhood... Now with some rhubarb and raspberries to balance the smoothness sweetness of vanilla milk rice. You can try it with different fruit combination. Strawberries and rhubarb, raspberries and peaches, blackberries and apricots. Just use your imagination and the best seasonal produce.


Raspberry and Rhubarb Vanilla Rice Pudding
 
4 - 6 servings

1 liter of 3.5% fat milk 

pinch of salt 
100g short-grain rice 
100-120g of sugar 
1 / 2 vanilla bean

350g rhubarb cut into small pieces 

1 / 2 teaspoon grated lemon peel 
30g sugar (or slightly more if the rhubarb is very tart) 
125g raspberries

 
Bring
the milk to boil  in a large pan with the vanilla bean split in half . Add to the boiling milk rice (previously rinsed) and a pinch of salt. At a very low heat (it has just to simmer very gently) cook it covered for about 1 hour, stirring frequently, until rice begins to thicken. If you have too much milk at the end of cooking, take off the lid for the last 15-20 minutes, so the liquid may evaporate. 10 minutes before the end of cooking add the sugar and remove vanilla bean.
Mix chopped rhubarb with sugar and lemon peel in a small saucepan. Cover it and cook over low heat until it falls apart and creates a kind of mousse.
When the rice cools down a little put it into bowls or glasses and top with rhubarb mousse and raspberries. You can eat it warm, at room temperature or cold from the fridge.


Enjoy !

Tuesday, June 1, 2010

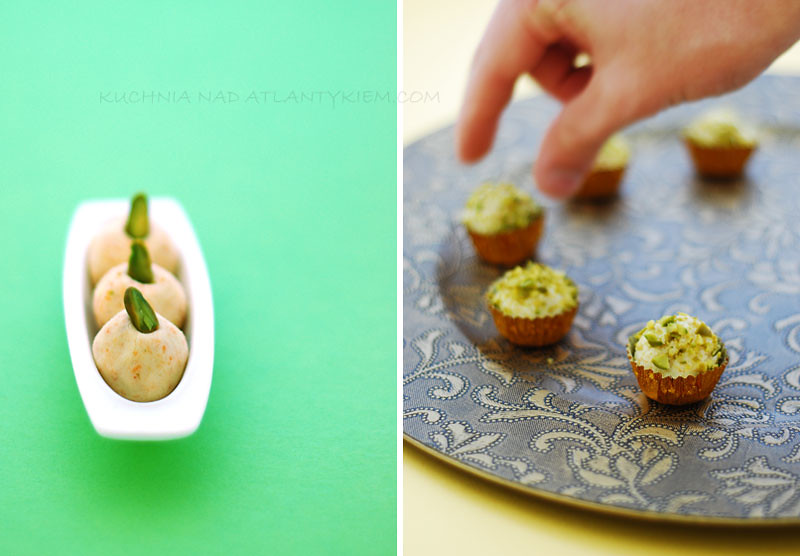
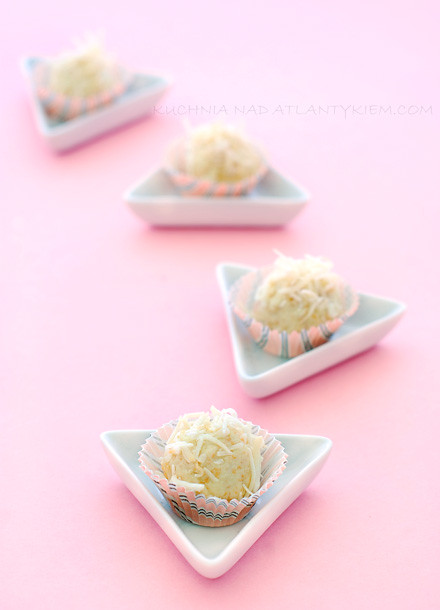
Coconut truffles from Goa

Coconut truffles from Goa

Coconut truffles from Goa ( 30 truffles )

35 g (1 / 2 cup) desiccated unsweetened coconut flakes
125g
ghee butter  (or regular clarified butter)
2 tablespoons of tahini sesame paste or smooth peanut butter
50 g (1 / 3 cup) icing sugar
150 g (1 and 1 / 2 cup) milk powder

coconut and chopped pistachios for decoration 


Coconut truffles from Goa

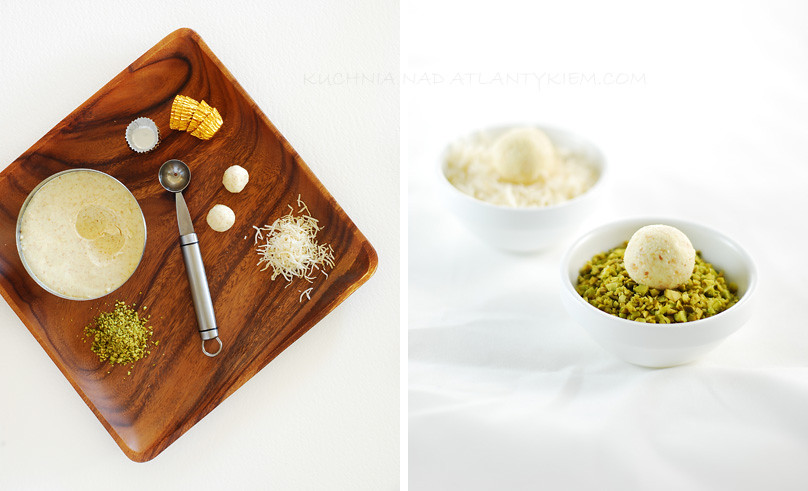
Melt the butter in a pan, pour half  of it to the mixer bowl. Add coconut flakes to the rest of the butter in a pan and fry them until they get golden brown. Mix the remaining butter in a blender with icing sugar and tahini (or peanut butter). Add fried coconut and then gradually add milk powder to the mixture until it is thick. 

Put the mixture into the refrigerator tightly covered until it set. 

Form small round truffles from the cold mixture (most convenient way is to use a little
ice cream scoop ) and then roll them with your hands. If the truffles stick to your hands, add more powdered milk. If it crumbles, add a little more melted butter. 

Once formed, you can coat the truffles with coconut or chopped pistachios but it is not necessary. The truffles  are just as good without these extras. Put them for 1 hour into the fridge and serve cold.


Coconut truffles from Goa 

Sunday, May 2, 2010

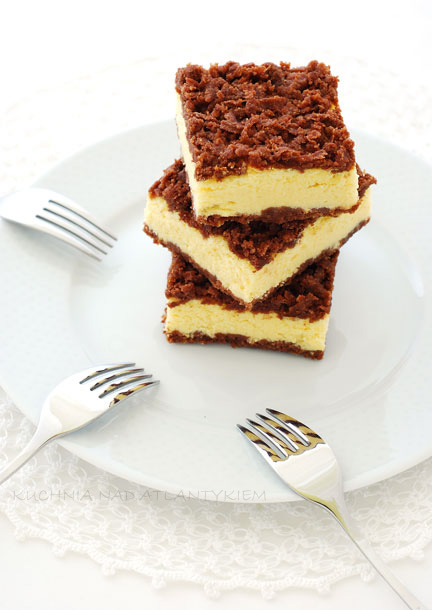
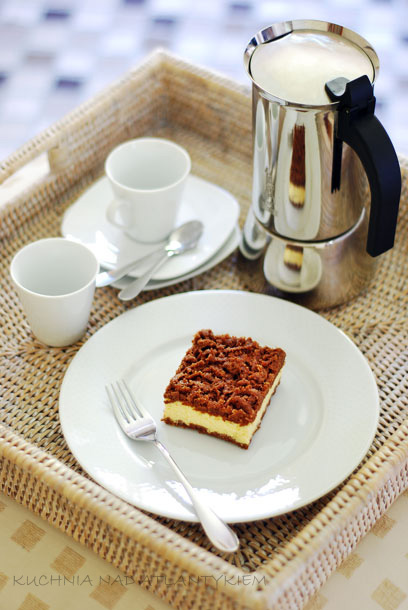
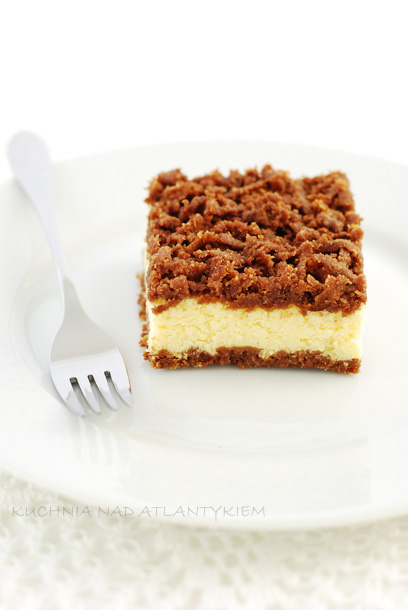
Black and white cheesecake with a touch of coconut

Chocolate Coconut Cheesecake


Chocolate Coconut Cheesecake

Black and white cheesecake with a touch of coconut

Cake pan: 40 x 26 cm, minimum depth - 5 cm

Crust:
400g flour 
20 g (3 tablespoons) of cocoa
1 / 8 teaspoon salt
1 teaspoon baking powder
50 g (8 tbsp)
unsweetened coconut flakes
100 g sugar
250 g cold butter
2 egg yolks


 Filling:
1 kg quark cheese 20% fat  (I've used the German Speisequark)

400 g cream cheese Philadelphia type


50 g unsweetened coconut flakes


315 g (1 1 / 2 cup) sugar


1 tablespoon grated orange peel

4 egg yolks

100 g butter, melted

40 g (1 pack) vanilla pudding powder (eg. Dr Oetker)


6 egg whites


pinch of salt

70 g sugar


Crust:
Sift flour, cocoa and baking powder. Add salt, sugar and coconut and cubed cold butter. Rub butter into flour until it get crumbly. Add egg yolks (all egg whites keep for the filling) and knead the dough into a ball. Divide the dough into 2 parts (the part that goes to the bottom should be slightly bigger). Wrap in foil and place in fridge for at least 1 hour.


 Filling:
Preheat the oven to 170 º C. Mix cheese with 315 g of sugar, orange peel and coconut. Add one egg yolk while still whisking. Mix in cooled melted butter and pudding powder. Beat the egg whites with a pinch of salt and 70 grams of sugar until very stiff. Stir white eggs gently with a spatula into the cheese mixture.

  
Grate the bigger part of the dough onto the bottom of the cake pan. Lightly press it with your hands. Pour the cheese filling. On top grate the rest of the dough. Bake for approximately 1 hour. Cool in the oven.

Chocolate Coconut Cheesecake


Enjoy !

Saturday, April 3, 2010

Sunday, March 28, 2010

Chocolate Mazurek for Polish Easter

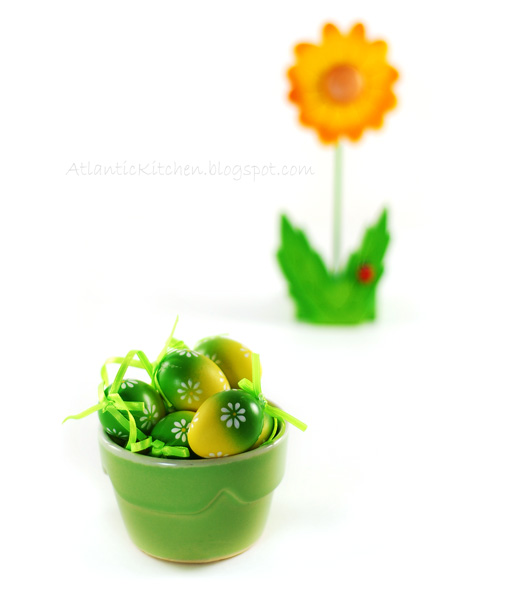
Easter Holidays Mazurek

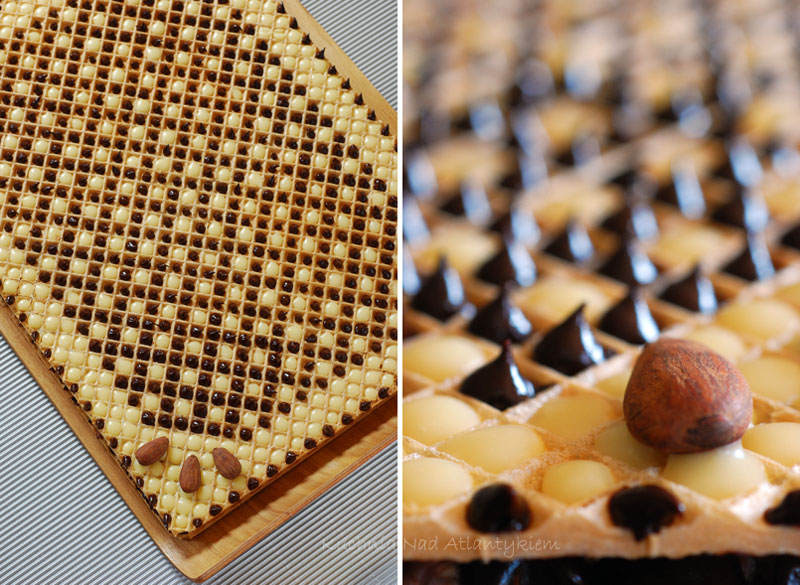
Mazurek is a classic Polish Easter dessert. About 3-4 cm high, rectangular, oval or round. Usually made with pastry crust or on wafers (the kind used for ice creams, only flat). As for the filling - it is always quite sweet and there is a great variety of classic fillings.

Easter Holidays Mazurek

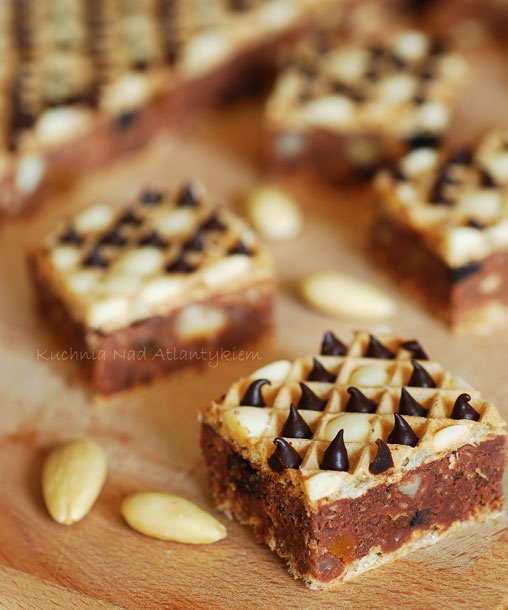
But the most crucial aspect in this cake is the decoration. The mazurek is always very elaborated and  usually features some Easter motives - eggs, chicks, bunnies, catkins ( here you have two photos of quite typical mazurek). Cake decorating is always a huge problem for me so this time I made only a simple geometric pattern, filling wafer holes with chocolate and almonds.

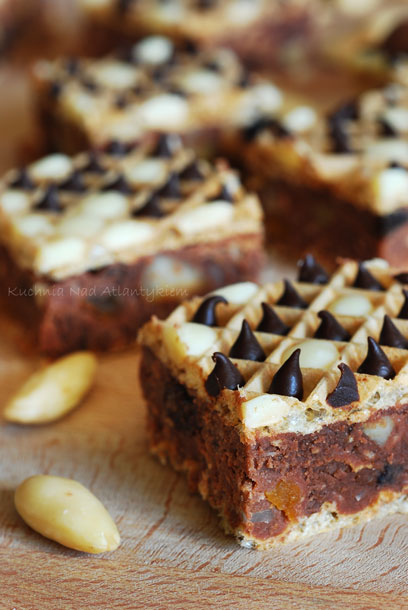
My mazurek has a rich chocolate filling studded with nuts, almonds and dried fruits. It is usually the first cake to disappear from our Easter table. :) Enjoy !

Easter Holidays Mazurek

Chocolate Mazurek

3 large rectangular thin wafers 
3/4 cup full fat milk 
3/4 cup sugar 
250 g butter 
500 g (18 oz) whole milk powder
3 tablespoons dark cocoa 
2 tablespoons nutella spread (or other chocolate- hazelnut spread)
50 g (2 oz) unsweetened coconut flakes
150 g (5 oz) approximately chopped nuts (walnuts, hazelnuts, almonds) and
100 g (4 oz) prunes and dried apricots cut into fine strips
100g (4 oz) raisins (dark and light, soaked in rum for 1 hour)

For decoration: 
100 g
(4 oz) white chocolate 
100 g
(4 oz) dark chocolate 
2 tablespoons butter 
6 tablespoons pouring cream 12-18% fat 
a few whole almonds

Bring to a boil milk with sugar (the latter must be completely dissolved - it is important!). Add the butter and mix until it melts. Leave to cool. Add powdered milk and cocoa and mix until everything is smooth and thick. Add nutella and mix again. Incorporate coconut flakes, one finely crushed wafer, nuts and dried fruits.  Spread the filling evenly on one wafer, cover with the other. Put a large chopping board and a pile of books on top of the cake. Leave on the counter overnight. After decorating you have to store it in the refrigerator, wrapped tightly in aluminium foil.

Decoration:
Melt each chocolate separately with half of the butter and cream in a microwave oven ( 180 W for about 1-2 minutes; remove, mix to check if it melted, and if necessary put it again to microwave for several seconds) or in a water bath.  Fill 2 pastry sleeves with 2 kinds of chocolate and decorate your cake. Insert some almonds in soft chocolate.

Friday, March 26, 2010

Easter Holidays Sauce

Easter Holidays Souce

Easter is approaching quite unexpectedly for me this year. We have barely recovered after Polish style Christmas and here again I have to think about the action plan and all the traditional food preparation for Easter.

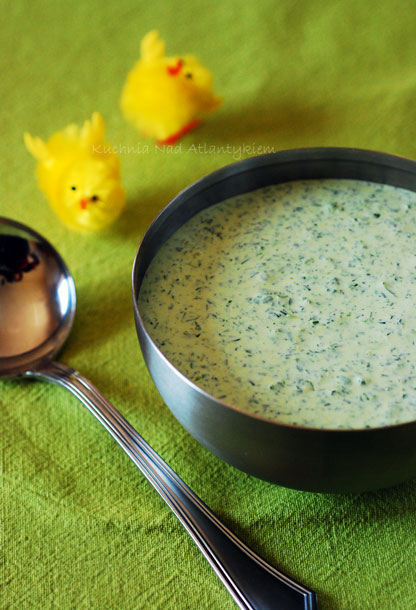
Today, I would like to show you a simple green sauce. I can not imagine Easter in our home without it. With the considerable quantity of fresh herbs and greens, it gets a nice colour. I serve it usually with hard boiled eggs ( a must on Polish Easter table). But it also goes nicely with roasted meats or pâté. I love to dip some radishes or slices of fresh cucumbers in it. You can also use it as a dressing for salads.

Green Sauce for Easter

1 egg, hard boiled and finely chopped
1 cup parsley, finely chopped
1 cup chives, finely chopped
1 cup dill, finely chopped
1/2 cup chinese chives (optional) or spinach leaves, finely chopped
1 tablespoon horseradish cream
1 teaspoon mustard
3 tablespoons mayonnaise
250ml sour cream or greek yogurt
salt and pepper to taste

Put chopped eggs and herbs in the bowl (instead chopping by hand you may use a small food processor to do the job for you, you need only a few brief pulses). Add the mustard, horseradish cream, mayonnaise and cream and mix well. Season with salt and pepper. Serve chilled.

Saturday, March 20, 2010

Portuguese style cheesecake

Portuguese Cheesecake

This wonderful dessert is very popular and widely available in almost every restaurant and coffee shop in Portugal. 

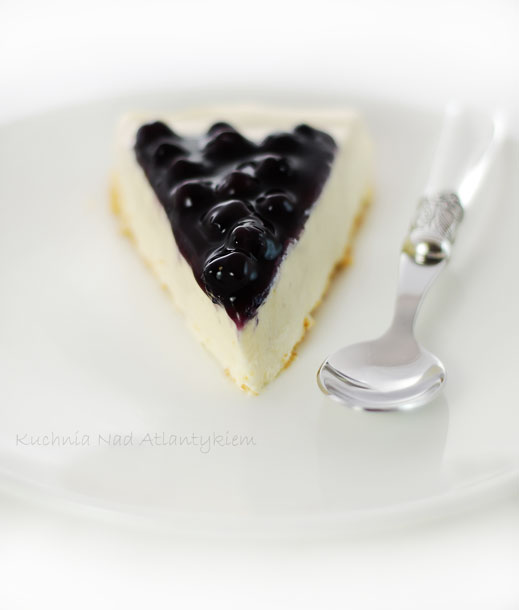
The taste of cheese is very subtle, if at all, perceptible. For some time I even thought  it was a cheesecake without cheese. ;) The filling is delicious - fluffy and creamy, almost like a mousse. It is made with Philadelphia cream cheese, sweetened condensed milk and heavy cream. My version is a little bit less sweet than the original.


Portuguese Cheesecake

For the glaze I used blueberry pie filling which is very unusual in Portugal. A strawberry or blackberry jam spread on the top of the cheesecake is preferred in the classic version.

Enjoy !
Portuguese Cheesecake

Portuguese cheesecake

spring cake pan  25 cm of diameter
Crust:
150 g digestive biscuits
30 g (2 tablespoons) soft butter

 Filling:
400 g (1 and 1 / 4 cup = 310 ml) sweetened condensed milk
200 g (7oz) cream cheese
600 ml (20 fl oz = 1 and 1/2 cup) heavy cream, 35% fat 
 seeds scraped of 1/2 vanilla bean
5 gelatine leaves
4 tablespoons milk
Glaze:
1 can (15 oz) blueberry pie filling
or
1 jar of blueberry compote, bluberries in brine
corn starch for thickening

Crust:
Preheat the oven to 180ºC. Crush  biscuits with butter in food processor. Spread the crumbs in the springform pan. You may press them a little with the bottom of a glass. Bake the crust for 10 min. Cool it down. 
Filling:
In the medium bowl mix the condensed milk with cream cheese and vanilla. In a large bowl whip the heavy cream until stiff. Soak gelatin leaves in water, drain them and dissolve in 4 tbsp of milk on a very low heat (do not allow it to boil). Pour lukewarm gelatin in a thin stream into whipped cream beating constantly. Mix the cream cheese and condensed milk with cream until you obtain a smooth filling. Pour the filling on the crust and leave overnight in the fridge to set.

Glaze: 
If you are using the pie filling simply pour it onto the filling. 

If using the compote: Dissolve the cornstarch in several tbsps of water. Pour this mixture into the boiling fruit compote. Cook 1-2 min until it thickens, stirring continuously. Quantity of starch depends on the amount of liquid you have, and of course on how thick you want your  glaze. It is good idea to mix some tbsps of cornstarch in water and add this mixture gradually to the fruits. When cooled pour the glaze onto the filling.

Wednesday, March 10, 2010

Sesame cookies

Sesame cookies

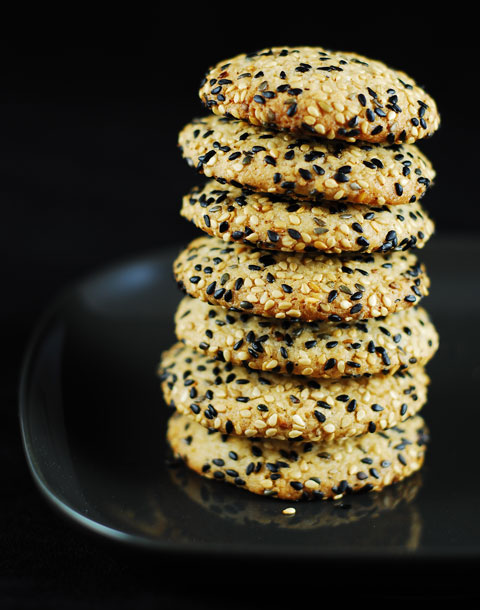
Native to Indonesia and tropical Africa sesame seeds are considered to be a symbol of luck and happiness.I can not say what is the intensity of this sensation but I can guarantee you at least the minimum time of happiness: the time you eat my sesame cookies.

Sesame cookies

I must admit that these are probably the most popular cookies in our house. My husband is a real sesame cookies addict and he is crazy about them.

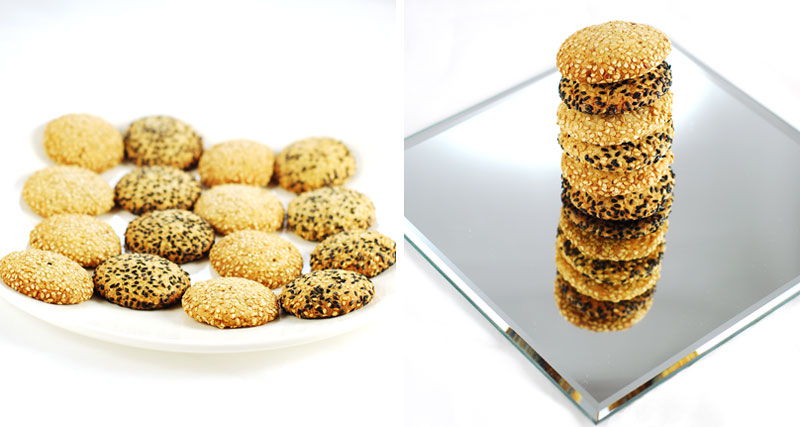
This is my classic sesame cookies recipe with slightly reduced amount of sugar and two types of sesame seeds. These cookies are really delicious, buttery inside and coated with a nice crunchy sesame shell.

Enjoy my sesame cookies you cookie monsters!

Sesame cookies

Sesame cookies

yield: 40 cookies (2 large baking sheets)

100 g (2 / 3 cup), sesame seeds, you can use a mixture of white and black 
100 g (7 tablespoons) butter 
70 g (1/3 cup) white sugar 
85 g (1/2 cup) light brown sugar 
1 large egg 
1 package (10 g = 2 teaspoons) vanilla sugar
170 g (1 and 1/4 cup) flour 
1/2 teaspoon baking powder 
1/4 teaspoon salt 
1/4 teaspoon cinnamon powder

Roast sesame seeds in a dry frying pan (about 5 minutes on a low heat, until the sesame seeds begins to smell nicely). Mix butter with 2 types of sugar and vanilla sugar. Add egg. Sift flour with baking powder, cinnamon and salt and gradually add to the dough still mixing. At the end stir in half of the sesame seeds. Refrigerate the dough until firm (for at least 1 hour). 

Preheat the oven to 190ºC (375ºF). Remove the dough from the refrigerator and roll small balls about 3cm in diameter (you can form them with a spoon, but it is easier to use a small ice cream scooper  and then roll the ball in your hands). Roll each ball in remaining sesame seeds. Place the cookies on the prepared baking sheet lined with baking paper, spacing the cookies a couple of inches apart (a maximum of 20 balls on a large oven baking tray). Flatten each cookie slightly with your palm.

Bake for about 10-15 minutes, until golden (golden ! , not brown, be careful not to overbake, the longer the baking time the crunchier the cookies, I prefer them baked for 11-12 minutes, but it depends on the oven, of course. Remove from baking paper when cooled.

Saturday, February 13, 2010

Multilayered honey cake for a Valentine's Day

Medovik

Quite unusual  idea for a Valentine's Day. It is not pink nor red, it doesn't have a heart shape but at least it's  so sweet... just like honey. ;)

I spotted this recipe on two beautiful Serbian blogs (thank you Ljilja and Marija). The authors mentioned that it was a very famous Russian cake. Actually it is also quite popular in Poland. There are many different versions of miodownik, as we call the cake in Polish. You may found it rolled like a Swiss roll or with honey-walnut topping. There are also many kinds of fillings (with wheat cream, sour cream or  a simple butter cream). I presented my Christmas version of this cake some time ago on my Polish blog.

Today I was tempted to try the multilayered Russian version  with simple sourcream filling. I modified the original recipe (that can be found here), changing some quantities and simplifying it a bit.

Medovik

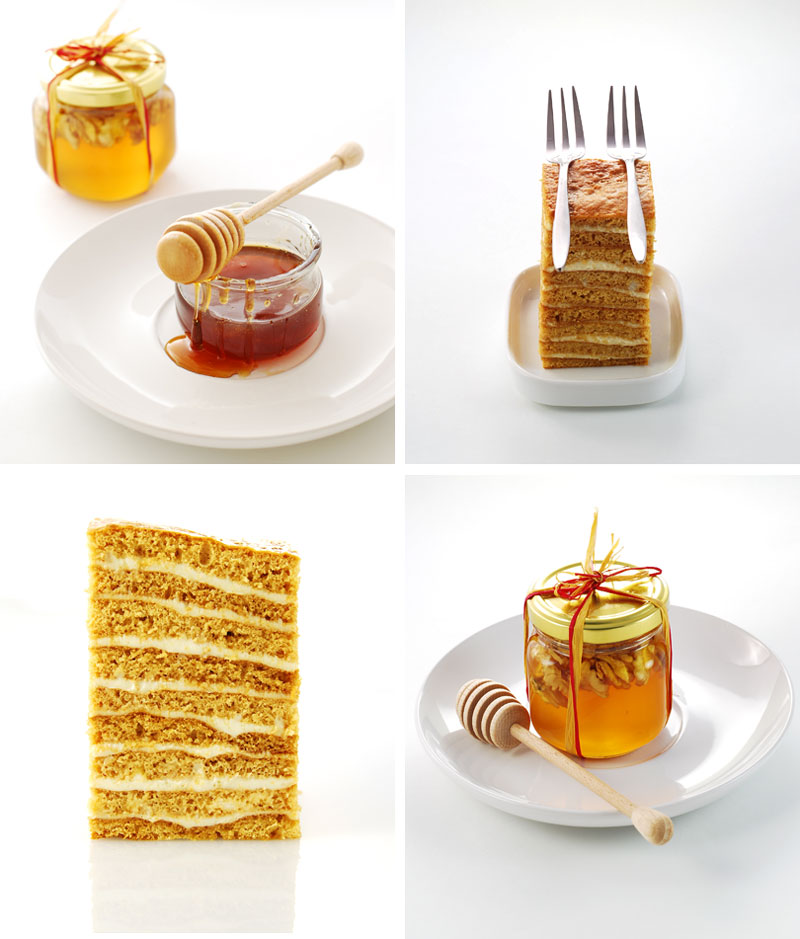
I have to admit this cake is quite time consuming but definitely worth all the effort. The dough is a little bit difficult to spread in the pan (it is sticky and you want to have a very thin layer so it is easier to spread it with wet hands). You have to bake at least 3 layers (in order to obtain 9 final layers) and then spread them carefully with sour cream. The filling will be trying to escape outside the dough layers so it is important (vital) to use very thick cream with high fat content. I adjusted sugar and sour cream quantity in order to obtain the best results (IMHO). It was almost impossible for me to spread all 1,5 litre of cream over the layers, so I used instead only about 1 litre and 3/4 cup of sugar.
 
The cake must stay in the fridge overnight. Honey cake layers absorb some sour cream and get pleasantly moist and soft. Happy and sweet Valentine's Day!!

Medovik

Multilayer Honey Cake with Sour Cream Filling (Miodownik) 

flat baking pan 30 x 40 cm
3 large sheets of baking paper 
aluminum foil

Honey Dough:
3 large eggs
pinch of salt
220 g (1 cup) sugar
70 g (4 tbsp) butter
60 g (3 tbsp) honey
2 teaspoons baking soda
550 g flour

Filling:
1 litre sourcream 30-40% fat, or thick crème fraîche
170 g (3/4 cup) sugar
7.5 g vanilla sugar

Beat eggs with a pinch of salt and sugar until thay are creamy and fluffy. Melt honey and butter in the microwave or in the pan on the stovetop. Cool it and add to the egg mixture, mixing everything together. Add soda and mix again. Add the flour in batches, stirring with a wooden spoon, until you get thick but soft dough.

Preheat the oven to 180ºC. Divide the dough into 3 parts. With the aid of your wet hands spread each portion of the dough thinly in the pan lined with baking paper. Bake each layer for about 6-8 minutes, until it gets honey-golden (you must be very carefull and keep checking them in the oven, so they do not burn).

Mix the sourcream with sugar and vanilla sugar. Put into the refrigerator. When the honey cake layers are cooled completely carefully peel off the baking paper. Cut each layer into 3 sections (across the long side). This way you get 9 rectangular pieces.

Spread sourcream on 8 layers. The last one, which goes on top, will stay without the filling . Leave all of them for a moment so the cream moistens the cake a little (just for 5-10 min). On a large sheet of aluminum foil put the layers on top of each other (carefully transferring them with the aid of a long and broad knife). At the top stack the last layer without filling. If the sourcream spills out you may spread it on the sides of the cake. Wrap the honey cake thightly in the aluminum foil and put in the fridge. I spread the aluminum foil on a cutting board and then move it along with the cake to the refrigerator. Leave in the refrigerator overnight.  

Friday, February 12, 2010

Oranges in aromatic syrup

3

One of the most underestimated fruits are probably oranges. We take their robust juiciness and sweet, pleasantly acidic taste completely for granted. Lemons, oranges and tangerines are in shops all year long so it is easy to forget they are typically winter fruits. And right now it's citrus harvest time so they are at the peak of their taste.

Here in Portugal there is an abundance of citrus trees so it is quite easy to find good quality fruit, moreover without an excessive carbon print. Today I made a very simple dessert, featuring oranges. It is quite elegant and very easy to make.  Most importantly we need to get the best sweet and juicy type of orange. I really like navel oranges (did you know they come from the single mutation of one orange tree in some monastery garden in Brazil?). But for me the absolutely best ones are those picked directly from a tree in Portuguese Algarve region, famous for its orange groves and beautiful beaches. I know that this is completely silly, but I like to buy oranges at the market with leaves still attached. :)

I would like to invite you today to a nice and simple orange dessert in Northern African style, with the addition of some dried dates (apricots will do pretty nice here, too), and aromatic spice syrup.

Oranges and dates in aromatic syrup


Oranges with dates in vanilla and clove syrup

yields 4

4 oranges
250 ml water
150 g sugar
8 dates
4 cloves
1 vanilla bean

With a sharp knife remove bottom and top of each orange. Cut off the peel (with albedo) from the sides and slice the fruits horizontally. Reserve the peel from 1 orange. Remove as much of albedo as you can from the reserved peel and cut the orange rind into thin strips.

Boil water with sugar. Leave on medium heat until it thickens and begins to resemble syrup. Add orange rind, cloves, dates and splited vanilla bean. Simmer on low heat for another 5 minutes. Distribute orange slices over 4 bowls. Pour the hot syrup over them. Place two dates, one clove and a piece of vanilla bean on the top of each portion . Serve cooled. 
 

Monday, February 1, 2010

Tartiflette or what to eat this winter.

Reblochon

Today we have winter food for dinner as a kind of preparation for our skiing holidays in the Pyrenees mountains. This dish is, however, from Franch Savoy region (Haute-Savoie, just south of Geneva) and has a more Alpine character. 
Since the Middle Ages this relatively isolated and inaccessible region has been producing an excellent cheese called reblochon. How was it born ? Well, it was some kind of  "how to avoid paying tax" story.  In the XIII and XIV-th centuries Savoy peasants paid a tax according to the amount of milk their herds produced. Crafty folks, however, did not fully milk the cows and when the tax collector was gone they completed their milking. With this high-fat milk farmers made cheese. The name reblochon comes from the French reblocher  - "to milk a cow again". The cheese production center is Thônes, a small town in the picturesque  Aravis Massif region. As to the taste - the mature cheese has a slightly nutty flavor and intense aroma. Its interior should be smooth and almost molten in the center. Reblochon is relatively soft. Its rind colour varies from creamy white to dark yellow with a delicate mould coating. French classify it as a pâte pressée non-cuite type of cheese (actually in English wikipedia  it is called a soft washed-rind cheese which is wrong according to the producer information).


The today's dish doesn't have such a long history as its main ingredient - the reblochon cheese. Due to the wave of interest in Savoy regional cuisine in the 80s of the last century, a tartiflette - reblochon flagship dish - was invented. The inspiration came from an old regional recipe, known as la pela.  


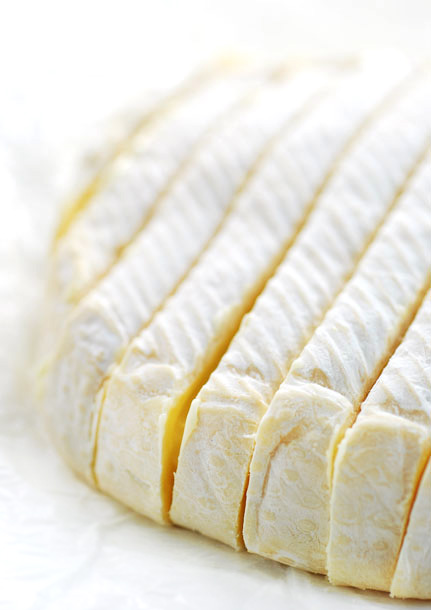
Methods of preparation may vary a lot. Everyone has its own way of cutting the cheese. Some cut it in cubes, others cut the cheese in half horizontally and some prefer to remove the rind. Very often it is cut in slices, like I did today.  

Onions and bacon for tartiflette

I got the recipe from my Portuguese friend Celeste but of course I had to modify it a little bit. She has lived in France for many years and sometimes shared with me her great recipes for regional dishes. It is a good idea to serve tartiflette with a big bowl of lettuce salad. You can also put some thinly sliced cold roasted meat and pickles on the table. We liked it very much in the company of sweet and sour onions in balsamic vinegar. Wine is a must. Pour some white wine into the dish while cooking and drink the same white or sip a simple young red along with your meal. So today, please enjoy a simple peasant food from the French mountains. It tastes especially nice after a long day of skiing, cleaning the snow from your front porch or pretty much anything you have to do in a freezing cold weather.

Tartiflette
Tartiflette 

1 kg potatoes, boiled in jackets in salted water  

1 tablespoon butter  
100 g smoked bacon, chopped
1 red onion, chopped
1 white onion, chopped
100 ml dry white wine  
100 ml crème fraîche or thick sour cream 
 salt and freshly ground pepper to taste  
1 / 2 teaspoon freshly ground nutmeg  
500 g reblochon cheese* 

Preheat the oven to 200ºC . Peel and cut
boiled potatoes in thick slices (1.5 cm, about 1/2 inch). Fry bacon in butter, add onion and sauté until softened. Add wine and potatoes. Mix everything well and remove from heat. Add the crème fraîche, salt, pepper and nutmeg. Put half of the potato to buttered ovenproof dish. Cut the cheese in a fairly thick slices, put half of them on potatoes, spread the rest of the potato mixture and cover with the remaining cheese. Put into preheated oven and bake for about 20-30 minutes until nicely browned. 

* Substitutes for reblochon: gruyère, taleggio, fontina, raclette cheese or perhaps a ripe camembert or munster
(every soft and easily melting cheese will do). In Portugal, amanteigado cheese will be great but the best substitute for reblochon is certainly queijo da Serra.

Wednesday, January 27, 2010

Chocolate and caramel tartlets

Chocolate cream tart.

My name is Agnieszka and I am a chocoholic. Quite an intimate confession, isn't it?  ;) Sadly, in my case, it is rather a serious addiction.  It can be as strong as nicotine or alcohol. I wonder if there are any Chocoholic Anonymous because I suppose I'm not the only one in the clutches of addiction.

In contrast to people who are satisfied with only one cube of dark chocolate (70% of cocoa solids at least) per day, I worship milk chocolate. When it melts in my mouth I am in heaven. Unfortunately, I can only satisfy my desire with an ever increasing quantity.

What is really funny - I'm not very fond of chocolate flavour in other sweets. Chocolate ice cream does not tempt me at all. Once a year I have a craving for a nice Portuguese chocolate mousse. As far as chocolate cakes are concerned I'm extremely picky and demanding. Here I agree with the "not worth the calories" concept. What does this strange term mean? Well, it's quite simple: if you take a diet break and you want to devour something hypercaloric you better choose a food that promises you a culinary ecstasy.

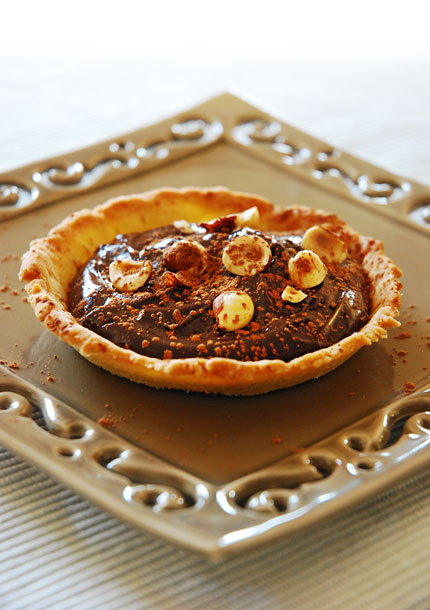
And there are some chocolate pastries that can lead me to nirvana. Today's tartlets reflect my passionate desire for a decent chocolate creation. They are perfect for a party because you can make them in almost no time if you bake the crust shells one day ahead.

So close your eyes, forget about calories and enjoy a creamy chocolate filling with a delicate caramel aftertaste, all of this inside a crunchy hazelnut crust.


Chocolate caramel tartlets

Chocolate and caramel tartlets

12 small or 6 medium tartlet tins

Hazelnut crust:
210 g all-purpose flour
30 g hazelnuts, chopped
2 tablespoons sugar
125 g cold butter, diced
1 egg yolk
1-2 tablespoons ice cold water (optional)

Filling:
50 g light brown sugar (my favourite is rapadura)
20 g butter
60 ml single cream or half and half (12% fat)
150 g dark chocolate, coarsely chopped
60 ml whipping cream (35% fat)
3 tablespoons hazelnuts, toasted and coarsely chopped
1-2 tablespoons dark cocoa powder

Hazelnut crust:
  Put flour, nuts and sugar into a food processor. Pulse a few times until you get a finely ground mixture. Add the butter and process until the mixture begins to resemble crumbs. Now add the egg yolk and pulse until the dough forms a ball (you may need to add some ice cold water). Flatten into disk, wrap in plastic and chill in the fridge for 30 minutes.

Preheat the oven to 190ºC (375ºF).
Roll out the dough on lightly floured surface (silicone pastry board is excellent for that purpose) to 2/3cm thick. Press the dough onto bottom and up sides of buttered and floured tartlet pans. Prick the dough with a fork. Bake until golden brown for approximately 8-12 minutes. Leave to cool down on rack. Carefully take out the pastry shells from the pans.

Filling:
Put chopped chocolate in a heatproof bowl. In a saucepan, heat the sugar, butter and liquid cream. Stir until sugar dissolves and bring to a boil. Continue cooking on low heat for 2 minutes without stirring. Pour hot liquid on chopped chocolate in the bowl and mix until it dissolves. Add the whipping cream and mix again thoroughly. Leave to cool, then put in the fridge for 10 minutes. 

Pour the filling onto completely cooled crust shells. Sprinkle with chopped hazelnuts and cocoa.


Saturday, January 23, 2010

Arrufadas or bread rolls from Coimbra

I have to confess that I am not particularly fond of Portuguese pastries and bread. Perhaps it is because of my Polish roots. I used to eat dark wholegrain bread and here in the Iberian Peninsula, we have mainly the white. I love elaborate cakes with fruits, layered with whipped cream or full of spices.  Portuguese bakers do not need much more to make a cake than one thousand eggs, a tonne of sugar and maybe some flour. ;) Pastries and cakes are always wildly yellow and often covered with some ovos moles (a kind of paste made with yolks and sugar, of course).

Here, in Lusitania (as they sometimes call Portugal), the food is usually rather simple, which definitely does not mean tasteless. The local cuisine puts more stress on the extraction of flavour from a specific, high-quality product, than on the complex marriage of flavours and culinary techniques. Fortunately we don´t lack fresh fish, seafood, good wine or cheese. The Portuguese coffee is excellent as well.

Occasionally you can also find something very tasty in the realm of sugar and eggs. My last discovery is called arrufada (from the Portuguese arrufar for sulk, fuss, get angry). These are sweet buns usually sprinkled with sugar. But do not worry! The buns are not so fussy as their name suggests. I suppose this funny name comes from the little picky eaters. These sweet arrufadas are sometimes the only thing kids want to eat!

In the past these sweet bread rolls were eaten mostly on festivals, fairs and were very popular during Easter. Today you can buy them in almost every bakery in Portugal.

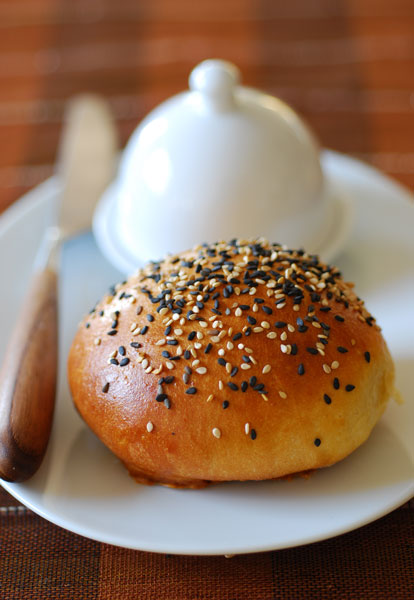
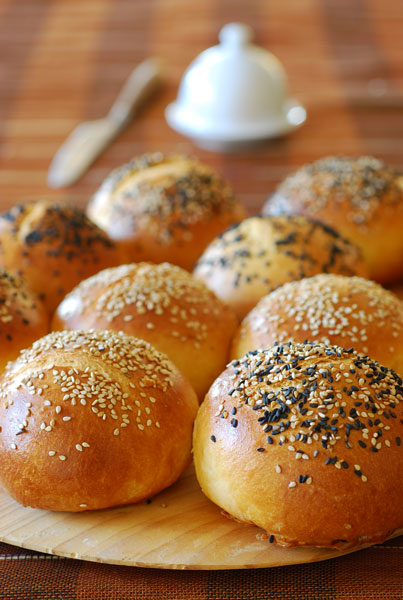
We love to eat fresh sweet bread for breakfast, so I decided to give them a try. It proved to be a very interesting recipe, although my idea of adding some sweetened condensed milk changes a little the "all-Portuguese" original. The crust is nicely browned and very delicate. The crumb is light, sweet, rich in flavour and, of course, as befits a Portuguese roll, intensely yellow. ;)

Arrufadas come from Coimbra, the city famous for its university - one of the oldest in Europe (est. 1288 A.D.). In the South of Portugal the buns are almost always sprinkled with sugar but in the Northern part of the country you can also find some coconut on the top. But most of Portuguese people will call the latter version pão de deus (divine bread). To avoid excessive sweetness I sprinkled my bread rolls with black and white sesame seeds.
Sweet bread rolls from Coimbra 
(Arrufadas) 

Wet ingredients: 
50 g (1.75 oz) butter, melted 
75 ml (2.5 fl oz) milk, warmed 
3 eggs, slightly beaten 
200 g or 150 ml (5 fl oz = 2/3 cup) sweetened condensed milk 

Dry ingredients:
500 g (17.5 oz) white wheat flour type 65 (you may substitute it with bread flour)

grated peel from 1/2 lemon 
25 g (1 oz) light brown sugar
1/3 teaspoon salt
2 and 1/2 teaspoon dried yeast

Topping:
1 egg, beaten with 3 tablespoons of single cream (10% fat) to brush the top
sugar or white and black sesame seeds to sprinkle

Sift all the dry ingredients. Put in a bowl and make a well in the middle. Pour all the wet ingredients into it. Mix in the bowl and then knead on the counter until you have a smooth and elastic dough. You may do all of this in a bread machine on "Dough" cycle. Cover the dough and  leave it to rise in a warm place until it has doubled in volume.

Turn the dough out onto a lightly floured surface. Slightly flatten it with the palms of your hands, form a long roll, and divide it into 12 equal portions. 
Form each piece into a roll (here I found an excellent tutorial). Put the rolls seam side down on the baking paper and leave to rise to double in volume again (it takes about 40 min). 
In the meantime, preheat the oven to 180ºC. Brush the rolls with a mixture of egg and cream and sprinkle with sesame seeds or sugar. Bake until they are golden brown for about 25-30 min.