Sunday, March 28, 2010

Chocolate Mazurek for Polish Easter

Easter Holidays Mazurek

Mazurek is a classic Polish Easter dessert. About 3-4 cm high, rectangular, oval or round. Usually made with pastry crust or on wafers (the kind used for ice creams, only flat). As for the filling - it is always quite sweet and there is a great variety of classic fillings.

Easter Holidays Mazurek

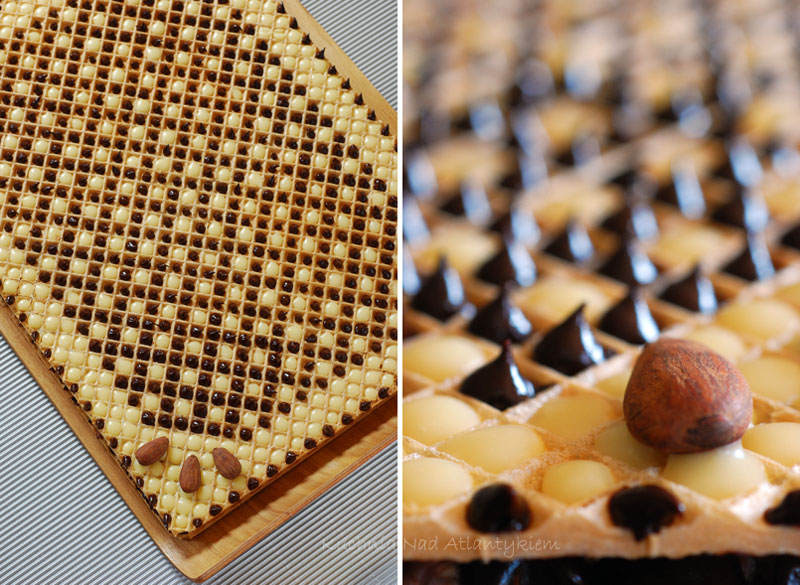
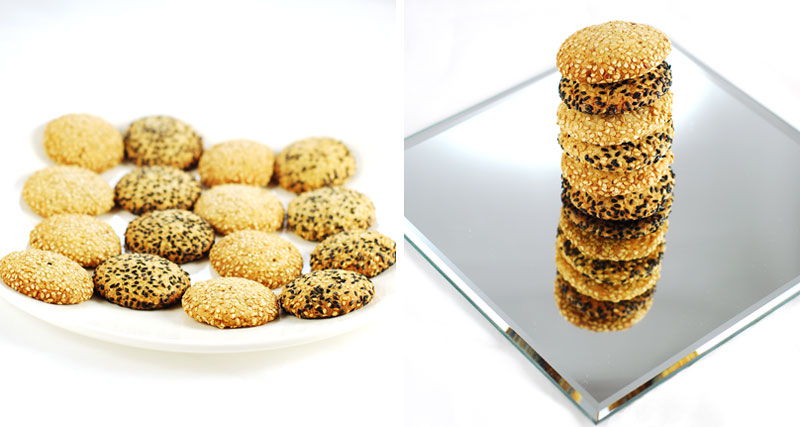
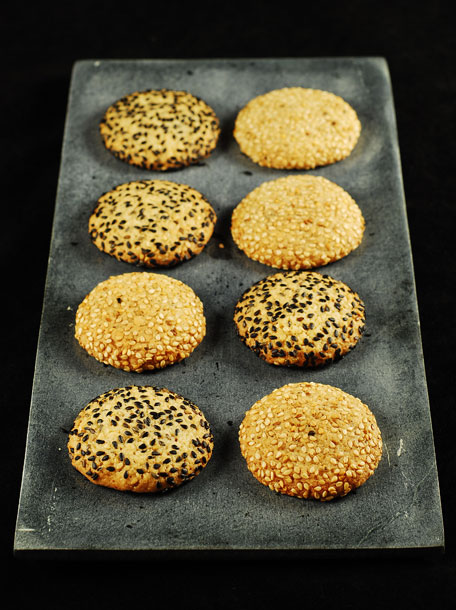
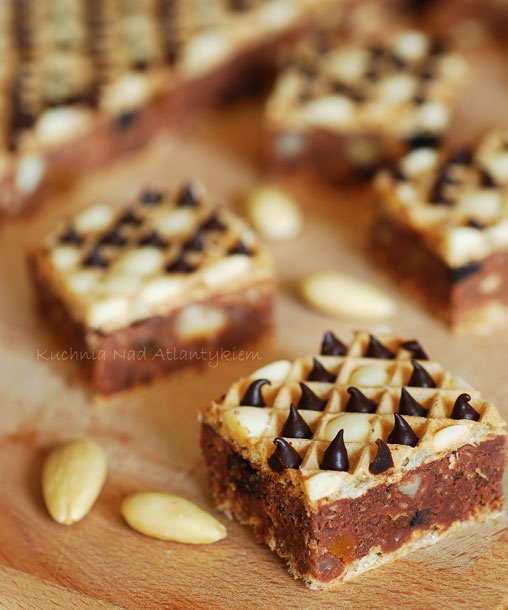
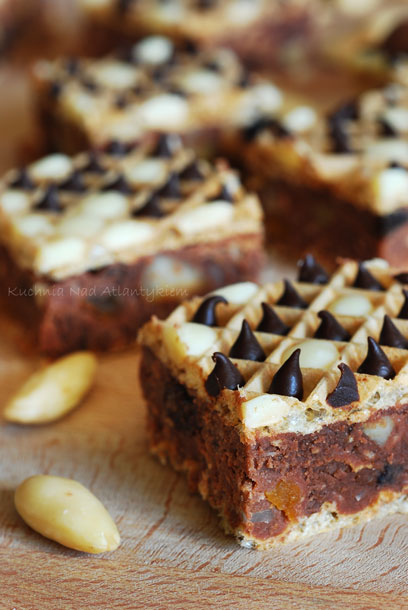
But the most crucial aspect in this cake is the decoration. The mazurek is always very elaborated and  usually features some Easter motives - eggs, chicks, bunnies, catkins ( here you have two photos of quite typical mazurek). Cake decorating is always a huge problem for me so this time I made only a simple geometric pattern, filling wafer holes with chocolate and almonds.

My mazurek has a rich chocolate filling studded with nuts, almonds and dried fruits. It is usually the first cake to disappear from our Easter table. :) Enjoy !

Easter Holidays Mazurek

Chocolate Mazurek

3 large rectangular thin wafers 
3/4 cup full fat milk 
3/4 cup sugar 
250 g butter 
500 g (18 oz) whole milk powder
3 tablespoons dark cocoa 
2 tablespoons nutella spread (or other chocolate- hazelnut spread)
50 g (2 oz) unsweetened coconut flakes
150 g (5 oz) approximately chopped nuts (walnuts, hazelnuts, almonds) and
100 g (4 oz) prunes and dried apricots cut into fine strips
100g (4 oz) raisins (dark and light, soaked in rum for 1 hour)

For decoration: 
100 g
(4 oz) white chocolate 
100 g
(4 oz) dark chocolate 
2 tablespoons butter 
6 tablespoons pouring cream 12-18% fat 
a few whole almonds

Bring to a boil milk with sugar (the latter must be completely dissolved - it is important!). Add the butter and mix until it melts. Leave to cool. Add powdered milk and cocoa and mix until everything is smooth and thick. Add nutella and mix again. Incorporate coconut flakes, one finely crushed wafer, nuts and dried fruits.  Spread the filling evenly on one wafer, cover with the other. Put a large chopping board and a pile of books on top of the cake. Leave on the counter overnight. After decorating you have to store it in the refrigerator, wrapped tightly in aluminium foil.

Decoration:
Melt each chocolate separately with half of the butter and cream in a microwave oven ( 180 W for about 1-2 minutes; remove, mix to check if it melted, and if necessary put it again to microwave for several seconds) or in a water bath.  Fill 2 pastry sleeves with 2 kinds of chocolate and decorate your cake. Insert some almonds in soft chocolate.

Friday, March 26, 2010

Easter Holidays Sauce

Easter Holidays Souce

Easter is approaching quite unexpectedly for me this year. We have barely recovered after Polish style Christmas and here again I have to think about the action plan and all the traditional food preparation for Easter.

Today, I would like to show you a simple green sauce. I can not imagine Easter in our home without it. With the considerable quantity of fresh herbs and greens, it gets a nice colour. I serve it usually with hard boiled eggs ( a must on Polish Easter table). But it also goes nicely with roasted meats or pâté. I love to dip some radishes or slices of fresh cucumbers in it. You can also use it as a dressing for salads.

Green Sauce for Easter

1 egg, hard boiled and finely chopped
1 cup parsley, finely chopped
1 cup chives, finely chopped
1 cup dill, finely chopped
1/2 cup chinese chives (optional) or spinach leaves, finely chopped
1 tablespoon horseradish cream
1 teaspoon mustard
3 tablespoons mayonnaise
250ml sour cream or greek yogurt
salt and pepper to taste

Put chopped eggs and herbs in the bowl (instead chopping by hand you may use a small food processor to do the job for you, you need only a few brief pulses). Add the mustard, horseradish cream, mayonnaise and cream and mix well. Season with salt and pepper. Serve chilled.

Saturday, March 20, 2010

Portuguese style cheesecake

Portuguese Cheesecake

This wonderful dessert is very popular and widely available in almost every restaurant and coffee shop in Portugal. 

The taste of cheese is very subtle, if at all, perceptible. For some time I even thought  it was a cheesecake without cheese. ;) The filling is delicious - fluffy and creamy, almost like a mousse. It is made with Philadelphia cream cheese, sweetened condensed milk and heavy cream. My version is a little bit less sweet than the original.


Portuguese Cheesecake

For the glaze I used blueberry pie filling which is very unusual in Portugal. A strawberry or blackberry jam spread on the top of the cheesecake is preferred in the classic version.

Enjoy !

Portuguese Cheesecake

Portuguese cheesecake

spring cake pan  25 cm of diameter
Crust:
150 g digestive biscuits
30 g (2 tablespoons) soft butter

 Filling:
400 g (1 and 1 / 4 cup = 310 ml) sweetened condensed milk
200 g (7oz) cream cheese
600 ml (20 fl oz = 1 and 1/2 cup) heavy cream, 35% fat 
 seeds scraped of 1/2 vanilla bean
5 gelatine leaves
4 tablespoons milk
Glaze:
1 can (15 oz) blueberry pie filling
or
1 jar of blueberry compote, bluberries in brine
corn starch for thickening

Crust:
Preheat the oven to 180ºC. Crush  biscuits with butter in food processor. Spread the crumbs in the springform pan. You may press them a little with the bottom of a glass. Bake the crust for 10 min. Cool it down. 
Filling:
In the medium bowl mix the condensed milk with cream cheese and vanilla. In a large bowl whip the heavy cream until stiff. Soak gelatin leaves in water, drain them and dissolve in 4 tbsp of milk on a very low heat (do not allow it to boil). Pour lukewarm gelatin in a thin stream into whipped cream beating constantly. Mix the cream cheese and condensed milk with cream until you obtain a smooth filling. Pour the filling on the crust and leave overnight in the fridge to set.

Glaze: 
If you are using the pie filling simply pour it onto the filling. 

If using the compote: Dissolve the cornstarch in several tbsps of water. Pour this mixture into the boiling fruit compote. Cook 1-2 min until it thickens, stirring continuously. Quantity of starch depends on the amount of liquid you have, and of course on how thick you want your  glaze. It is good idea to mix some tbsps of cornstarch in water and add this mixture gradually to the fruits. When cooled pour the glaze onto the filling.

Wednesday, March 10, 2010

Sesame cookies

Sesame cookies

Native to Indonesia and tropical Africa sesame seeds are considered to be a symbol of luck and happiness.I can not say what is the intensity of this sensation but I can guarantee you at least the minimum time of happiness: the time you eat my sesame cookies.

Sesame cookies

I must admit that these are probably the most popular cookies in our house. My husband is a real sesame cookies addict and he is crazy about them.

This is my classic sesame cookies recipe with slightly reduced amount of sugar and two types of sesame seeds. These cookies are really delicious, buttery inside and coated with a nice crunchy sesame shell.

Enjoy my sesame cookies you cookie monsters!

Sesame cookies

Sesame cookies

yield: 40 cookies (2 large baking sheets)

100 g (2 / 3 cup), sesame seeds, you can use a mixture of white and black 
100 g (7 tablespoons) butter 
70 g (1/3 cup) white sugar 
85 g (1/2 cup) light brown sugar 
1 large egg 
1 package (10 g = 2 teaspoons) vanilla sugar
170 g (1 and 1/4 cup) flour 
1/2 teaspoon baking powder 
1/4 teaspoon salt 
1/4 teaspoon cinnamon powder

Roast sesame seeds in a dry frying pan (about 5 minutes on a low heat, until the sesame seeds begins to smell nicely). Mix butter with 2 types of sugar and vanilla sugar. Add egg. Sift flour with baking powder, cinnamon and salt and gradually add to the dough still mixing. At the end stir in half of the sesame seeds. Refrigerate the dough until firm (for at least 1 hour). 

Preheat the oven to 190ºC (375ºF). Remove the dough from the refrigerator and roll small balls about 3cm in diameter (you can form them with a spoon, but it is easier to use a small ice cream scooper  and then roll the ball in your hands). Roll each ball in remaining sesame seeds. Place the cookies on the prepared baking sheet lined with baking paper, spacing the cookies a couple of inches apart (a maximum of 20 balls on a large oven baking tray). Flatten each cookie slightly with your palm.

Bake for about 10-15 minutes, until golden (golden ! , not brown, be careful not to overbake, the longer the baking time the crunchier the cookies, I prefer them baked for 11-12 minutes, but it depends on the oven, of course. Remove from baking paper when cooled.